Followers

Thursday, March 29, 2012

Born to the Purple

Hi All!!! Thank goodness it's Thursday just one more day of work left until the weekend!!! I'm still working my way through all the Kleancolor polishes I got so today I thought I would put up another one. 


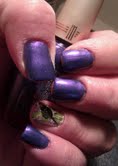
This is a coat of Kleancolor's Born To The Purple. It is a purple tinted gel with all kinds of chunky glitter flakes. Because it was so clear I had to put 2 coats of Rimmel's 60 second polish in Zenith on first. Here are a couple of shots of this also...


I then applied the coat of Born to The Purple and 2 coats of Seche Vite. It turned out a really pretty purple which is kind of hard to actually capture properly in a photograph :( 


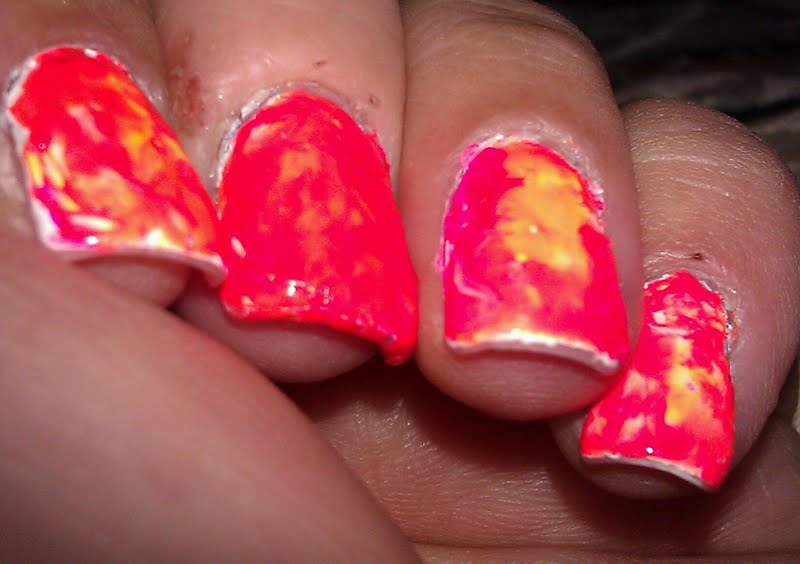
I also decided to try rounding my nails instead of having the square edge. I don't really know what to make of it. What do you guys think??? I feel like they may be on the way back in as I have noticed a lot more celebrities with rounds nails now. My boyfriend and co workers all liked it because they said it made my fingers look longer and thinner. That is a major plus for me since I have the smallest hands ever. My sister calls them Carni hands LOL after the carnival workers from the fair... How rude LOL!


Don't forget, I still need 3 more followers for the MASH Plate giveaway!!! All you have to do to have a chance to win is become a follower! 

Monday, March 26, 2012

City Never Sleeps


Did everyone have a good Monday??? I saw a late show of The Hunger Games last night and was totally dragging all day today. I don't think anyone could have been happier for 6 O'Clock than me today! I'm still trying out some of the Kleancolor polishes I got off of Ebay. I loved this manicure and have actually kept it on for over 3 days now. Pretty much a record for me! :P


I started with 2 coats of a gorgeous blue by Kleancolor called Neon Sapphire. I loved this color so much I almost couldn't bare to put anything over it... Here's one more pic, just because it's so pretty!


Then I put on one coat of Kleancolor's City Never Sleeps, which is a spectacular blend of turquoise dust glitter and chunky gold and magenta glitter pieces. It came out so pretty! I tried to take a couple different pics so you could see some of the different colors.


I then put a coat of Seche Vite as seen above. Of course, then I couldn't stop myself from trying to see what it looked like with a coat of Essie's Matte About You.


I loved it both ways, but the Matte ended up being my favorite. What do you guys think??? Don't forget only 3 more followers needed before the random lucky winners are chosen for the MASH plate giveaway!!! Spread the word so you won't miss your chance to win! 

Friday, March 23, 2012

Dry Marbling and a Giveaway!!!

Happy Friday!!! I'm so glad it's the weekend. I wanted something bright and peppy since the skies have turned dark and gray, so i decided this was an excellent time to try out the dry marbling technique I have been seeing on Pinterest with my neons. It didn't turn out as lovely as I would like, but it was worth a try...


I first painted all of my nails with a white by Sinful called Snow Me White just like I did with the regular water marbling nails. (2 coats) 
Sorry I didn't clean up the polish off my cuticles until the end...


 I then used the polishes in the picture below by putting but a couple drop of each color on my nail and then swirling it around with a toothpick. This was definitely wayyyyy cleaner than the water marbling, but I don't think it really looks all the similar either, unless I just did it wrong???


Also, I was soooooo excited to get all my packages I ordered from Ebay!!! I got 12 new Kleancolor polishes, which are all gorgeous! I have never used their polish before so I am excited to see what they will look like. I was also really excited for some new stamping image plates by MASH. Imagine my surprise when I ripped them open and thought to myself "UH-oh these look really familiar." Yup that's right I apparently already have the exact same images from Konad!!!!! So guess what, do you smell a give away coming up or what?!


 So I've decided that when I get to 10 followers I will be giving these brand new plates away to a few random followers!!! Spread the word if you know anyone interested in some free Image plates.  Enjoy your weekend!

Wednesday, March 21, 2012

Lost my Marbles Water Marbling

Happy Hump Day!! I'm just barely managing to make it through the day with out wanting to run out of work. It doesn't help that the weather is absolutely gorgeous outside... We're talking 80 degrees in NW Indiana in the middle of March, that's like unheard of. So you can imagine why I would rather be anywhere than in the office right now :(  Oh well... 

After a horrendous failed attempt on my friend Carmen's nails, we never even dipped one of her nails! The nail polish would not cooperate and do anything we wanted it to! This was my first attempt at water marbling on myself and I must admit it was a bit more tedious that I thought it would be. I honestly thought I was well prepared after further researching by watching the videos and reading all the advice on the subject, but no such luck. I did get better towards the end and I definitely noticed that some polishes work better for this than others. In the end I really only had one or two nails that I really liked and the rest were just so so to me.


I first applied 2 coats of Sinful's Snow Me White, and then put tape around my nails once they were dry to try and avoid a huge polish mess from the marbling. Sorry I didn't bother cleaning up the polish on my cuticles for this since I knew I would just have to do it again after the marbling.


I then used Pure Ice in Wild Thing, Sinful's Neon Melon, Irish Green, CoCoa Diamond, and then I tried to put a dab of a glitter polish in my Sinful called Green Ocean, but that didn't really show up at all. 


This one was my favorite. It was the pinky finger on my right hand, so the very last one I did. It turned out pretty different than the others for some reason, but I think that by the end I finally got the hang of it LOL. Sorry it's a bit blurry! 


 All in all I would definitely try this again and hope that I could perfect it a lot more. I also want to try the non water marbling technique I saw on Pinterest a few days ago. It looked a lot less messy. 


Monday, March 19, 2012

Ga Ga for Goldfish

Happy Monday! I spent most of the day at the hospital with my boyfriend, Keith so this is gonna be a quick and easy post today. I was so excited to finally get to use some of the foil stickers I got from Maytheps. Hope you like it!


I first started my filing my ring finger a bit so that I had a rough surface for the foil sticker to adhere to. I looked for foils that weren't similar to anything I could get locally from Sally Hansen or something like that. I came across this goldfish one and totally loved it! I have a pet Beta named Binx that looks a little like this so I am probably a bit biased :D

With flash...

Without flash
I loved all the holo colors in this. I really wanted to use the red ones too, but for the size of my ring finger I ended up having to use black on both. As it was I had to majorly trim this foil to be able to get the whole fish on my nail since I keep them short for typing at work. It's nice that they are made for longer nails so if you do have really long nails they will still cover it. 


I then followed with 2 coats of a Milani polish called Purple Passion. I loved how this color turned out. It's very pretty in person but for some reason my camera is not cooperating in picking it up. Just ignore my seriously dry thumb lol... It needs some cuticle oil like immediately! I then put a coat of Seche Vite over all my nails including the foil. After that I was still having issues with the foil wanting to come up a bit towards the end of my nail. This seems to always happen to me when I use this type of nail sticker. So I decided to file off the end more and ended up putting a layer of UV Gel on top of it. After that is feels just like my other nails and has lasted several days with out the normal wear. Usually by now I would have ripped it off already because I can't stand that sticky residue feeling. 

Hope you like it! I just ordered a few water decals and polish off of Ebay so I can't wait to get them in and try them out. Enjoy your evening!

Sunday, March 18, 2012

Pot of Gold


I had such a great time at the St. Patrick's day parade last night that I didn't get around to posting my last manicure for the holiday. This turned out a bit darker in person, so I didn't end up liking it as much as I thought I would. I thought I would share it anyhow.


First I put on 2 coats of this light gold Revlon polish called Sheer Honey. I have had this since what seems like the beginning of time so I honestly have no idea if they even still sell it or not.


Followed by 2 coats of a gold glitter polish by Sinful called All About You. I wish the glitter would have shown up better in the photo, but you get the idea...


Then I put on a coat of a dark turquoise type green called Tomorrow by 2012. This was a really strange Crackle, because it went on Matte, and dried extremely fast, making it kind of hard to work with. I actually hated it until I put a coat of Seche Vite over. Based on how this polish was, I don't know that I would ever buy another polish by 2012, because it was such a weird texture. Does anyone have any of their other colors that weren't like this???

Hope you all had a fabulous St. Patrick's Day also and I am tickled pink to have 4 followers!!! Yay! Thanks for your interest, it has truly made my day!

Friday, March 16, 2012

Win Me Clover

Happy Friday! I still wanted to go with the St. Patrick's day theme but I wanted to do them on a Navy, because I love those colors together. 


I found an awesome Navy by Sally Hansen Complete Salon Manicure called Navy Baby on clearance at my local Meijer's for less than $2. SCORE!  I was happily surprised I really only needed 1 Coat of this with a coat of Seche Vite over.


Then I used my new dotting tools to make 4 leaf shamrocks on each nail using a kiwi kind of green called Wild Thing by Pure Ice.


This still wasn't quite flashy enough for me LOL. Of course I wanted some glitter. I just used some fun glitter I got in packs from Michael's. It didn't have a name so I just decided to name it myself as Win Me Clover. I poured the packet into a clean empty loose eye shadow container I had and then just dipped my nail tip in it while it was still wet from the top coat. Then I used a small brush (or your finger would work also) to kind of spread the glitter up the nail a bit so it wasn't a big clump. Then I put on 2 coats of Seche Vite so it would be shiny and smooth. 


Thursday, March 15, 2012

A Splash of Green (So I won't get PINCHED)!!!

Hi!!! I hope everyone is getting the gorgeous weather that we have been getting all week. I have loved it, but it makes it really hard to want to come inside and post. Sorry I've been slacking! I just wanted to start posting some of the green St. Patrick's day looks I have been doing in preparation for this Saturday's fun.

First I started with 2 coats of ELF's Desert Haze. This is a light tan. It almost reminds me of a color you would paint your house. LOL


I then taped off a diagonal using scotch tape. I had a picture of this downloaded but for some reason it is not showing up. Go figure... I used 2 coats of Urban Decay polish in Green-9. I loved this shade of green. It reminds me of Forrest green from the Crayola box, which was one of my childhood favorites! Alone or with other polishes it was gorgeous and the consistency made it a dream to work with. I then added a little red flower rhinestone on my middle finger that I got in a pack at the dollar store. 

When adding rhinestones I usually just stick it on to the wet top coat and then apply another layer of top coat over that. 


I kept this on for a few days until I noticed that the ELF polish had started to yellow almost to a mustard color and it was looking kinda gross... So just for kicks using Wet & Wild's black creme I added another diagonal stripe using scotch tape. 

Can you see the yellowing towards the bottom of my nails... This drove me nuts because I kept thinking they looked dirty all the time. Besides that I really did love this manicure. 

Friday, March 9, 2012

Legally Blonde Bling

TGIF!!!! I'm so excited I'm going to Indy for the weekend with one of my high school BFFs. We're going to go see Legally Blonde the musical !!! So of course I needed a Legally Blonde inspired manicure!!!


Of course it had to be pink and lots of it! So I used 3 coats of my Funky Fingers in Pop Artist. A more ballet pink probably would have been better but I just like Hot Pink waaaay more and it looks so bright in the sun shine that we are actually getting right now!  I then used Bundle Monster stamp 09 for the diamond design with white Konad Stamping polish. 


I then wanted some sparkle and bling so I used Sinful's Pinky Glitter on top of the white stamping polish to make my diamonds sparkle. It's kind of hard to see in the pictures though sadly. But it is way more noticeable in person. Then for the bling I had found some nail rhinestones at the dollar store so I put those on top of a still wet coat of Seche Vite and then added another coat of Seche Vite on top. So far they are stick on really well and it's way easier than using glue.  Enjoy your weekend!!!


Wednesday, March 7, 2012

Purrrrrfect Kitty Cat

Hi! Sorry it's been awhile. Kind of had a crazy weekend here but I'm trying to get back on track. I really wanted to try a water marble manicure today but I ended up not having time because I made dinner and then my mom actually got on skype so that took up a lot of time. So I was forced to take the easy road since I couldn't show up to work tomorrow with my nails in the mess they were in. Seriously, it was bad...


This is a kitty cat nail design. I purchased these tips from my favorite nail supply store online at Maytheps. I want to say they were less than $2 for like 70 tips. This is the package below.


As you can see I really had to trim them down a lot after I glued them because they are WAYYYYYY too long for me. Here's a better picture of what the label looks like in case that helps too.


I used two coats of base gel and then one coat of top coat gel after gluing. Curing for 3 minutes under the UV lamp between each coat. Then I cleaned them off with the Gel Cleanser. It couldn't be easier to achieve a great looking manicure. Well I better run, I still have to post on my other new blog, NuVerus Weight Loss Challenge. Check it out if you get a chance :)


Friday, March 2, 2012

Dash and Grab

Well no new manicure today but at least it's Friday so there is something to be happy about. I just wanted to put the picture up of all the new Sinful polishes I grabbed from Walgreens the other day that I promised. All of them except the first and the last were in a new display even though the colors themselves are not necessarily new.


Starting at the left, the first is Snow Me White which I used in my last post and really liked. The second was displayed in the new Petal Pusher display and is called Pinky Glitter. I used this on the manicure before last that I did for my mom. I just thought it was mediocre, but it could also have been the coral color I put it on top of??? I am thinking I might like it better over a black. The green glitter I found in the new St Patrick's display and is called Green Ocean. I can't wait to try it. The fouth is also a Petal Pusher called Hazard. The fifth is a Petal Pusher called Savage that I used on the last manicure. I just love this hue of blue! The last one called Courtney OrangeI randomly found in a huge bin they had all mixed together and it stood out because it was a strage shiny burnt orange. Originally it was from the Go Plaid display. I can't wait to think up some new manicures to use these with. Enjoy the weekend! 

Thursday, March 1, 2012

Neon Chevron

Hello March! Now we're that much closer to Spring!!! I must have really been feeling it because my manicure is super bright. Almost obnoxiously so in sunlight. :D


I just bought a few (OK like 6 YIKES!)  new polishes from the Sinful displays at Walgreens that caught my eye and I couldn't wait to try them out. I'll have to put up a picture of all of them in my next post because I don't have the names with me now.


This was another tape manicure. For this I found it much easier to use the straight edge of tape pieces rather than cut out the triangle shape so that they would hopefully turn out more symmetrical. While my taping technique could still use a bit more practice, I did love the colors together so I decided I should post it anyways! Sorry there aren't more pictures but I did this at about 2 AM and my camera was completely out of batteries so I had to wait until the morning to get any picture at all! 


Since I was dealing with neon, I needed a good opaque base down first. For this I used a white polish by Sinful called Snow Me White. It took 2 coats for it to be all the way opaque. Then I used only one coat of a bright neon yellow by Sinful called Neon Melon. Next I used two pieces of tape to block out the triangle area  and painted what was exposed with a beautiful blue polish from Sinful's Petal Pushers colors called Savage. I probably should have done a 2nd coat with Savage but my eyes were seriously drooping! After that dried I used three pieces of tape to block out one side of the Chevron. I then used a sparkly dark gun metal color by Sinful called Secret Admirer to do the Chevron because I couldn't resist a little bling. Too bad it doesn't show up in the picture! I let it dry a few seconds and then moved the top piece of tape over to do the other side of the Chevron. Then a coat of Seche Vite for shine! Hope this makes you feel like spring is a bit nearer.